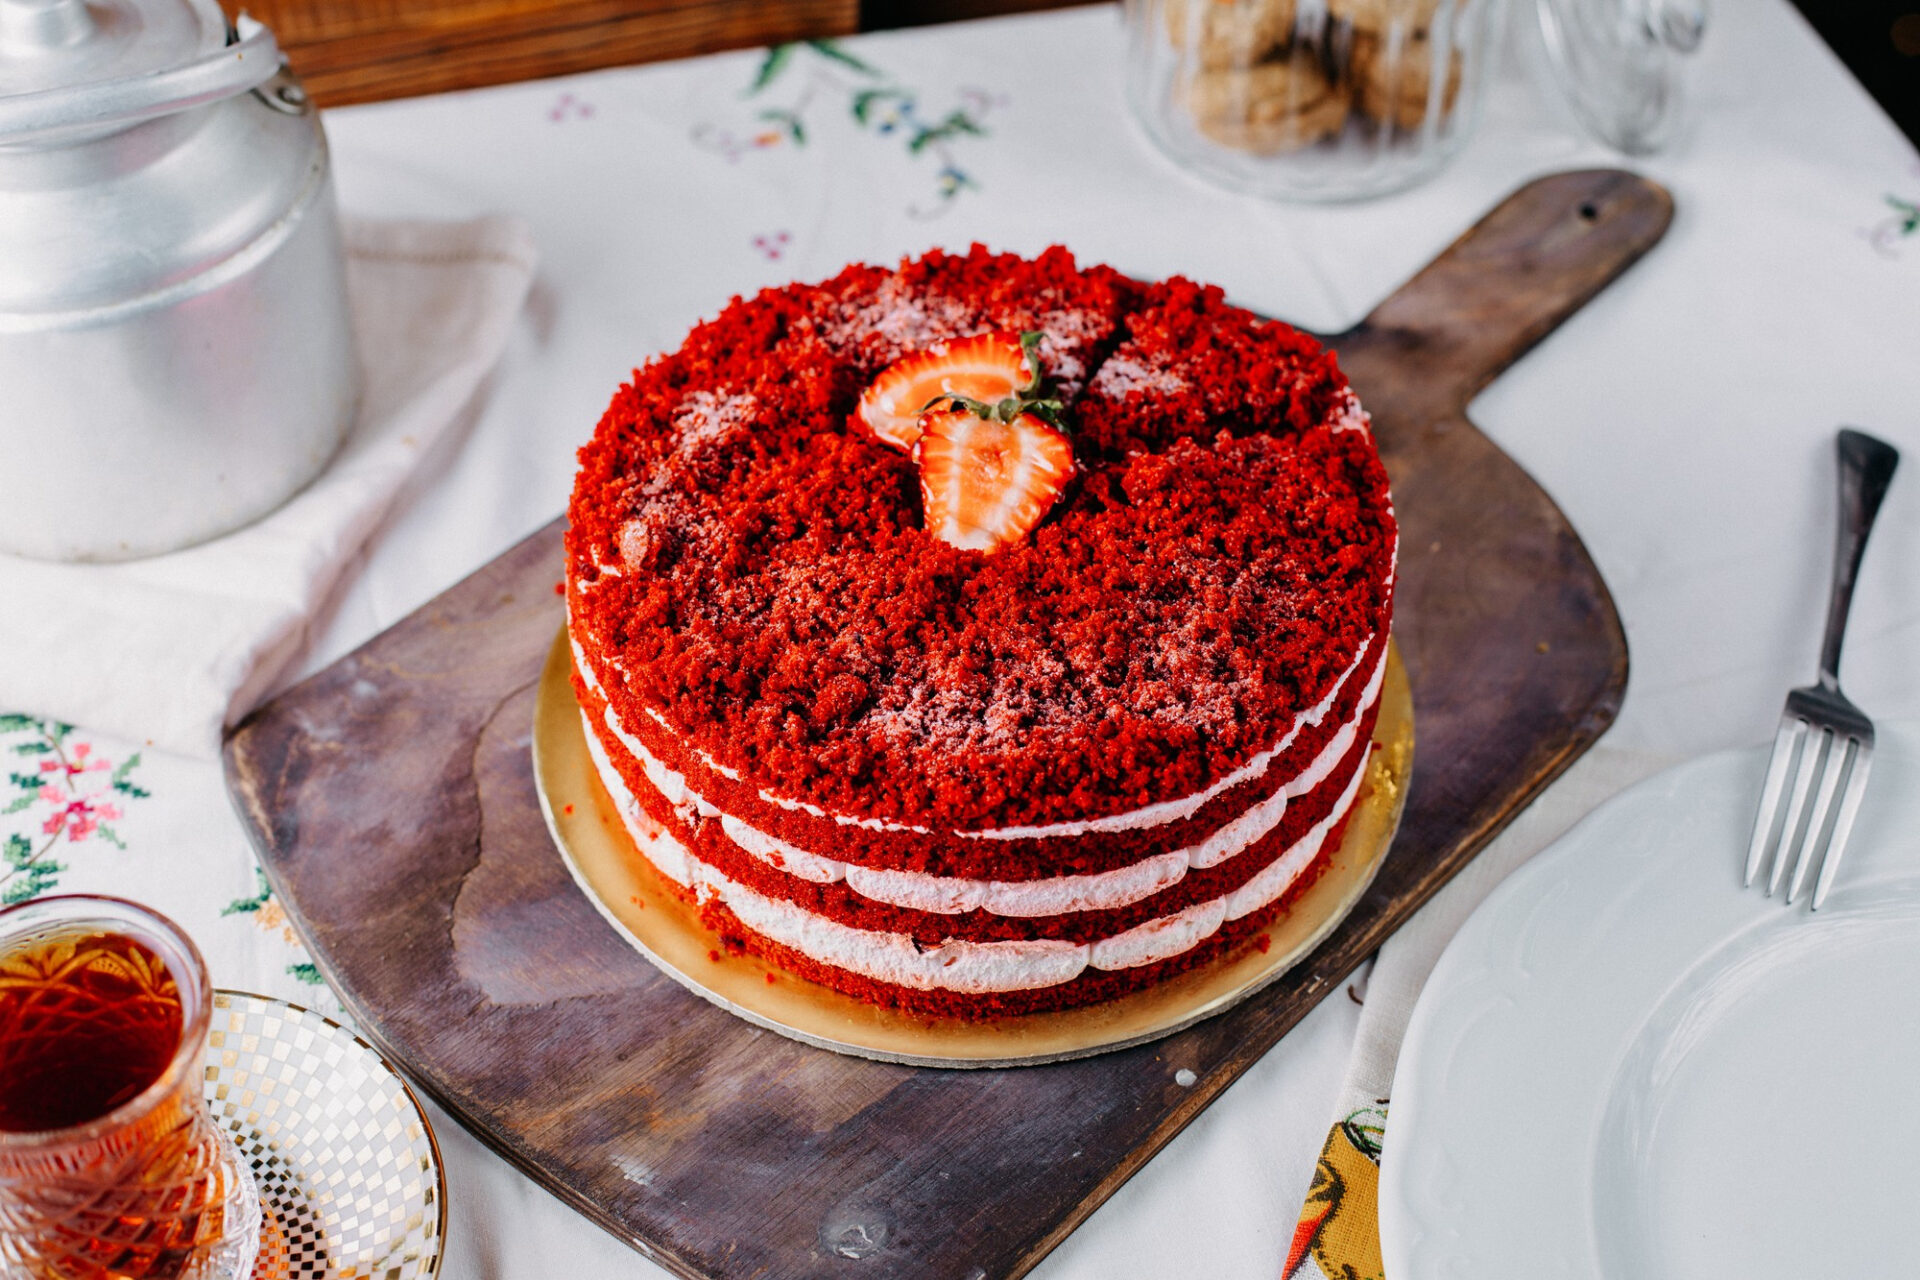
There’s something undeniably special about a red velvet cake. Its deep red color, soft crumb, and subtle cocoa flavor make it one of the most loved desserts across the world. Now imagine taking that classic favorite and elevating it with a glossy chocolate drip that flows beautifully down the sides. That’s exactly what a red velvet drip cake delivers.
This cake is not just about taste; it’s about presentation. The contrast of rich red layers, creamy white frosting, and a smooth chocolate drip creates a dessert that looks as stunning as it tastes. It’s the kind of cake that instantly becomes the centerpiece of any celebration.
Many people assume that making a drip cake is complicated, but the truth is that it becomes easy when you understand the basics. With the right techniques and a little patience, you can create a bakery-style red velvet drip cake right in your own kitchen.
In this detailed guide, you’ll learn everything from preparing the perfect red velvet sponge to achieving flawless frosting and drip consistency.
What Makes Red Velvet Cake Unique
Red velvet cake is different from regular chocolate or vanilla cakes. It has a very mild cocoa flavor combined with a slight tanginess, usually from buttermilk or vinegar.
The texture is soft and velvety, which is where the name comes from. Unlike dense cakes, red velvet has a light yet moist crumb that feels luxurious with every bite.
When paired with cream cheese frosting, the slightly tangy and creamy taste balances the sweetness perfectly. Adding a chocolate drip enhances both the visual appeal and flavor, making it even more indulgent.
Ingredients You’ll Need
To make a perfect red velvet drip cake, you need ingredients that ensure both flavor and texture.
For the Red Velvet Cake
- 2½ cups all-purpose flour
- 2 cups sugar
- 1 teaspoon baking soda
- 1 teaspoon cocoa powder
- ½ teaspoon salt
- 1½ cups vegetable oil
- 1 cup buttermilk
- 2 large eggs
- 2 teaspoons vanilla extract
- 1 teaspoon vinegar
- Red food coloring
For Cream Cheese Frosting
- 250g cream cheese
- ½ cup butter
- 3–4 cups powdered sugar
- 1 teaspoon vanilla extract
For Chocolate Drip
- 150g chocolate
- ½ cup cream
How to Make Red Velvet Cake Layers
Start by preheating your oven and preparing your cake tins. In a large bowl, combine the dry ingredients including flour, sugar, cocoa powder, baking soda, and salt.
In another bowl, mix oil, eggs, buttermilk, vanilla extract, vinegar, and red food coloring. The color should be vibrant but not overpowering.
Gradually combine the wet and dry ingredients, mixing until you get a smooth batter. Avoid overmixing, as it can affect the texture.
Pour the batter evenly into prepared tins and bake until a toothpick inserted in the center comes out clean. Once baked, allow the cakes to cool completely before moving on to frosting.
Preparing the Cream Cheese Frosting
Cream cheese frosting is essential for red velvet cake. It adds richness and balances the sweetness.
Beat the cream cheese and butter until smooth and creamy. Slowly add powdered sugar and vanilla extract. Continue mixing until the frosting becomes light, fluffy, and easy to spread.
The consistency should be firm enough to hold layers but soft enough to spread smoothly.
Assembling the Cake
Once the cake layers are completely cooled, level them if needed. Place the first layer on a cake board and spread an even layer of frosting.
Add the next layer and repeat the process. Once all layers are stacked, apply a thin crumb coat to lock in crumbs. Chill the cake for some time before applying the final coat of frosting.
The final layer of frosting should be smooth and clean, as it forms the base for the drip effect.
How to Create the Perfect Chocolate Drip
The drip is what makes this cake visually stunning. To prepare it, heat cream until warm and pour it over chopped chocolate. Let it sit for a minute, then stir until smooth.
Allow the ganache to cool slightly. If it’s too hot, it will run too quickly. If it’s too thick, it won’t drip properly.
Using a spoon or piping bag, gently add ganache along the edges of the cake. Let it drip naturally down the sides. Once the edges are done, pour the remaining ganache on top and spread evenly.
Tips for a Flawless Drip Cake
Getting the perfect drip requires attention to detail. The cake should be chilled before adding the ganache. This helps control the drip and prevents it from melting the frosting.
Testing the ganache consistency before applying it to the cake is always a good idea. Try a small drip on the side to see how it behaves.
Using good-quality chocolate makes a noticeable difference in both taste and appearance.
Flavor and Texture Experience
A red velvet drip cake offers a balanced flavor that is neither too sweet nor too heavy. The cake layers are soft and moist, while the cream cheese frosting adds a creamy tang.
The chocolate drip introduces a rich and slightly bittersweet note, enhancing the overall taste. Each bite feels indulgent yet well-balanced.
Variations You Can Try
Red velvet drip cake can be customized in many ways. You can add white chocolate drip instead of dark chocolate for a different look and taste.
Decorating the cake with berries, sprinkles, or chocolate shards can enhance its visual appeal.
For a lighter version, you can reduce sugar or use whipped cream frosting instead of cream cheese.
Common Mistakes to Avoid
One common mistake is overbaking the cake, which can make it dry. Keeping an eye on baking time is important.
Another mistake is applying the drip on a warm cake. This can ruin the frosting and make the ganache slide off.
Using too much food coloring can affect the taste, so it’s best to use it in moderation.
Best Occasions for Red Velvet Drip Cake
This cake is perfect for birthdays, anniversaries, and festive celebrations. Its elegant appearance makes it suitable for special events.
It also works well as a centerpiece dessert for gatherings, impressing guests with both taste and presentation.
Storage Tips
Red velvet drip cake should be stored in the refrigerator due to the cream cheese frosting. It stays fresh for up to four days when covered properly.
Before serving, let it sit at room temperature for a while to bring back its soft texture.
Conclusion
Red velvet drip cake is the perfect combination of flavor, texture, and visual appeal. Its moist layers, creamy frosting, and glossy chocolate drip make it a standout dessert for any occasion.
With the right techniques and a little practice, you can easily create this stunning cake at home. It’s not just a dessert; it’s an experience that brings joy with every slice.
Now it’s your turn to try this recipe and create a cake that looks beautiful and tastes even better.
FAQs
1. What makes red velvet cake different?
It has a mild cocoa flavor and a soft, velvety texture.
2. Can I make it without food coloring?
Yes, but it won’t have the classic red color.
3. Why is my cake dry?
Overbaking or using too much flour can cause dryness.
4. How do I get perfect drips?
Use slightly cooled ganache and a chilled cake.
5. Can I use butter instead of oil?
Yes, but oil gives a softer texture.
6. How long does it last?
Up to four days in the refrigerator.
7. Can I freeze the cake?
Yes, the layers can be frozen before frosting.
8. What frosting works best?
Cream cheese frosting is the classic choice
Try – Hummingbird Cake Recipe – Moist, Sweet & Irresistible Classic